
The Electro7101/Project X is a Tier 4 tank and one of the six current upgrade choices of the Overseer at Level 45. It can not upgrade any further. Upon upgrading, all Overseer Weapons are replaced with a custom Spawner. The tank may also spawn new players in team modes as a result of a past update.
Design[]
The Factory features a square body with a Spawner mounted at the front. In addition, all the spawned Drones have Cannons of their own. It is the second playable tank to have such a shape, the first being the Necromancer.
Technical[]
The Factory can control up to six Factory Drones, also called Minions. When not controlled by the player, the Drones will go after nearby entities, continually shooting very small Bullets (similar to those of the Gunner) at them.[1]
Drones and Bullets[]
The Factory’s Drones present Barrels of their own from which they can shoot Bullets. Individual Drone Bullets do not deal much damage — relatively speaking, they are about 53% as strong as those of an Auto Turret. But the Factory makes up for it in numbers: when combined, the firepower of the 6 Drones’ Barrels is around 96% of that of a Basic Tank. Given equal builds, each Factory Drone will shoot as many Bullets as a Basic Tank of the same build, albeit with reduced range and Bullet Speed.
As Drones, the Factory’s weapons present increased durability when compared to other projectiles. Nevertheless, their bodies, being twice as strong as normal triangle Drones, move at around only half the speed in return. The Drones are released from the Factory’s Spawner at a fairly regular rate, equal to that of the Manager’s Drone spawn rate. When taking the Drone’s Durability into account, the firepower of the Drone-Spawner alone is equal to that of the Overlord’s 4 spawners combined.
Controls[]
The Factory Drones present more complex behavior than other types of Drones. That is to say, they will move differently depending on their location in relation to the cursor. Because of this, different drones may perform different actions at the same time.
Attract[]
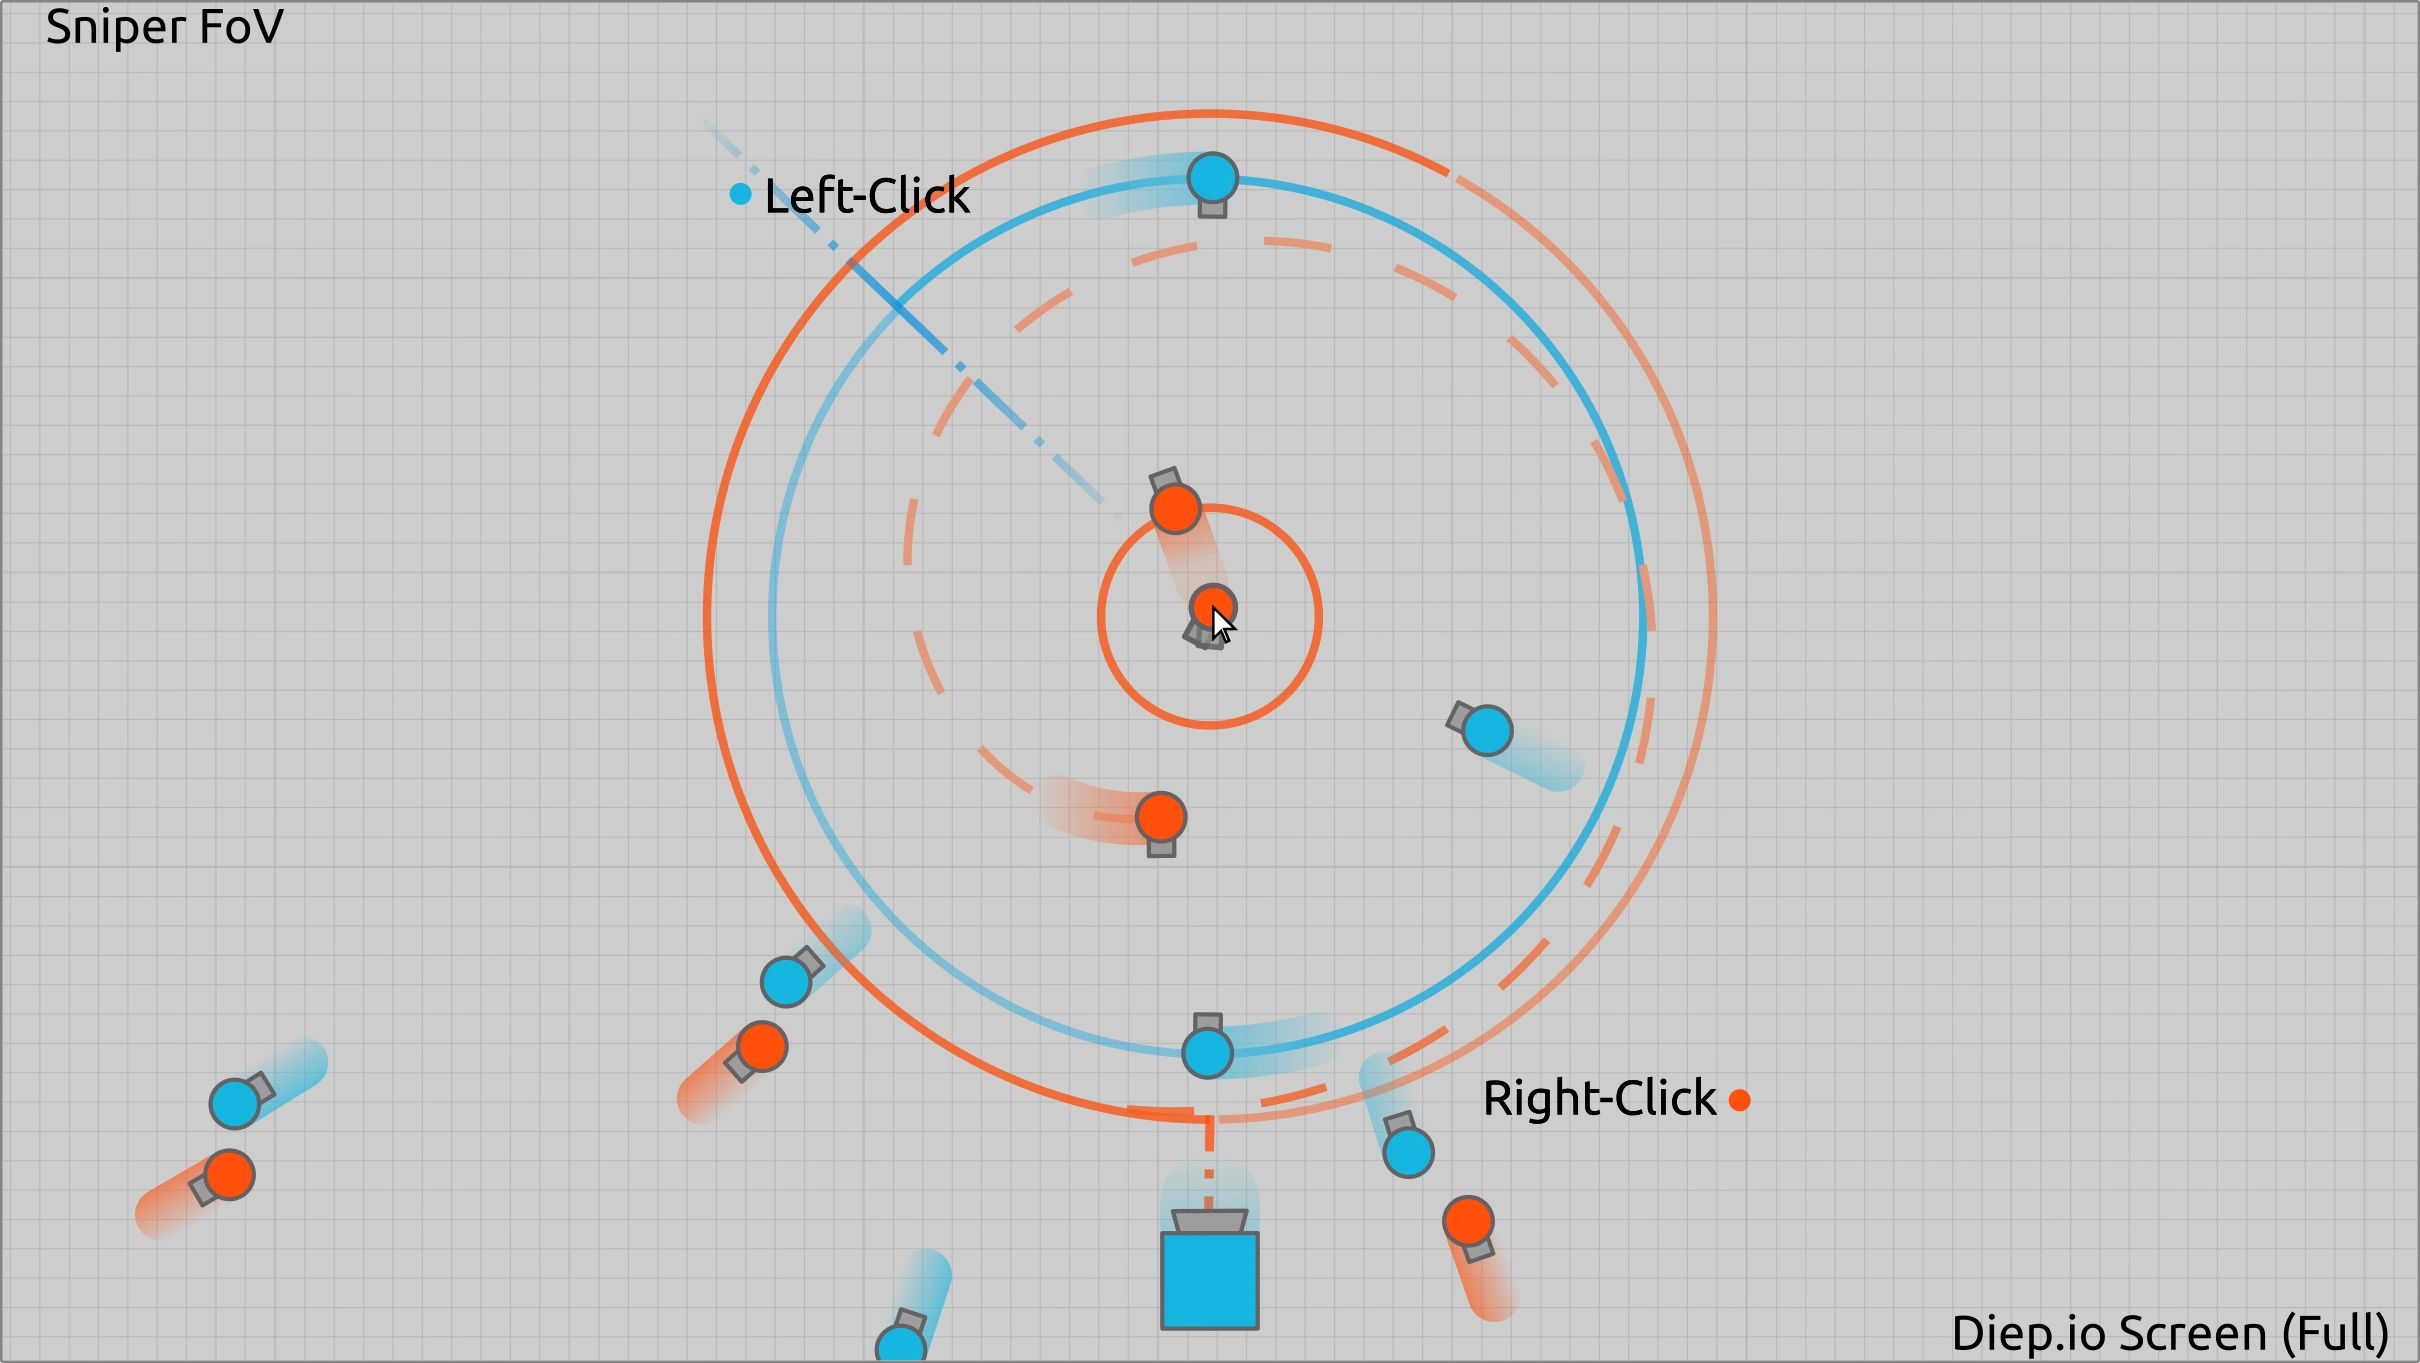
- When using Left-Click, the Drones will move in various directions while aiming for the cursor’s position
- If the Drones are far away from the pointer, they will be attracted to it until the blue orbit’s range is met.
- Once in a 16 background square radius around the pointer, the Drones will start moving around it in a counter-clockwise orbit. (It should be noted that the drones are always correcting their position while doing this, presumably because of the recoil they get from shooting bullets).
- If the distance is lower, the Drones will be repelled until the blue orbit’s range is met.
Because of these mechanics — and unlike with the other branches of Overseer; the Factory’s Drones won’t just ram targets when clicking upon them. However, they can still be tricked into doing it by hovering one’s mouse past the target’s position (instead of above it), moving the blue orbit past the target’s location, and thus tricking the drones into trying to go past it.
Repel[]
- When using Right-Click, the Drones will move in various directions while shooting away from the cursor
- Any Drones between 5-18 background squares from the cursor will move in a clockwise spiral, eventually escaping from it.
- Past the 18 background square limit, the Drones stop orbiting and are repelled from the cursor altogether.
- And below 5 background squares, the orbit collapses and Drones are forced together in a star formation.
AI[]
When not controlled by the player, the Factory’s Drones will go after nearby Polygons and Tanks, but once the player is damaged, they will target whatever damaged their Factory (if the aggressor is within their trigger range).
Stat Effects[]
- Bullet Speed: Increases Factory Drones’ Bullet Speed and Movement Speed.
- Bullet Penetration: Increases the Drones’ Bullet Penetration and Health.
- Bullet Damage: Increases the Drones’ Bullet and Body Damage.
- Reload: Increases Factory’s Drone spawn rate as well as the Drones’ rate of fire.
- Health Regen, Max Health, Body Damage and Movement Speed only make an effect on the Factory, just as how they buff other tanks.
It is good to note that all Bullet Stat upgrades are instantly given to any spawned Drones as soon as they fire again. However, as with other Drone Classes, the Drones must respawn for their other stats to be updated.
Strategy[]
- Strong Against: If skilled, the Factory can beat almost any class in one-on-one combat, mostly due to the high amount of damage its Drones can inflict if used well.
- Weak Against: Because of its limited Movement and Bullet Speed and the short distance its Drones’ bullets can travel, this class is quite vulnerable to groups of enemies. Any tanks considerably faster than 7 Movement Speed can ignore the Factory altogether.
As the Factory[]
- | For a more in-depth version of this section see Factory/Strategy.
The Factory requires a lot of concentration and control. Its Drones are rather slow, but they are extremely durable. Because of this, the most effective way to use this tank may be as follows:
- Players should keep their Drones to themselves at all times.
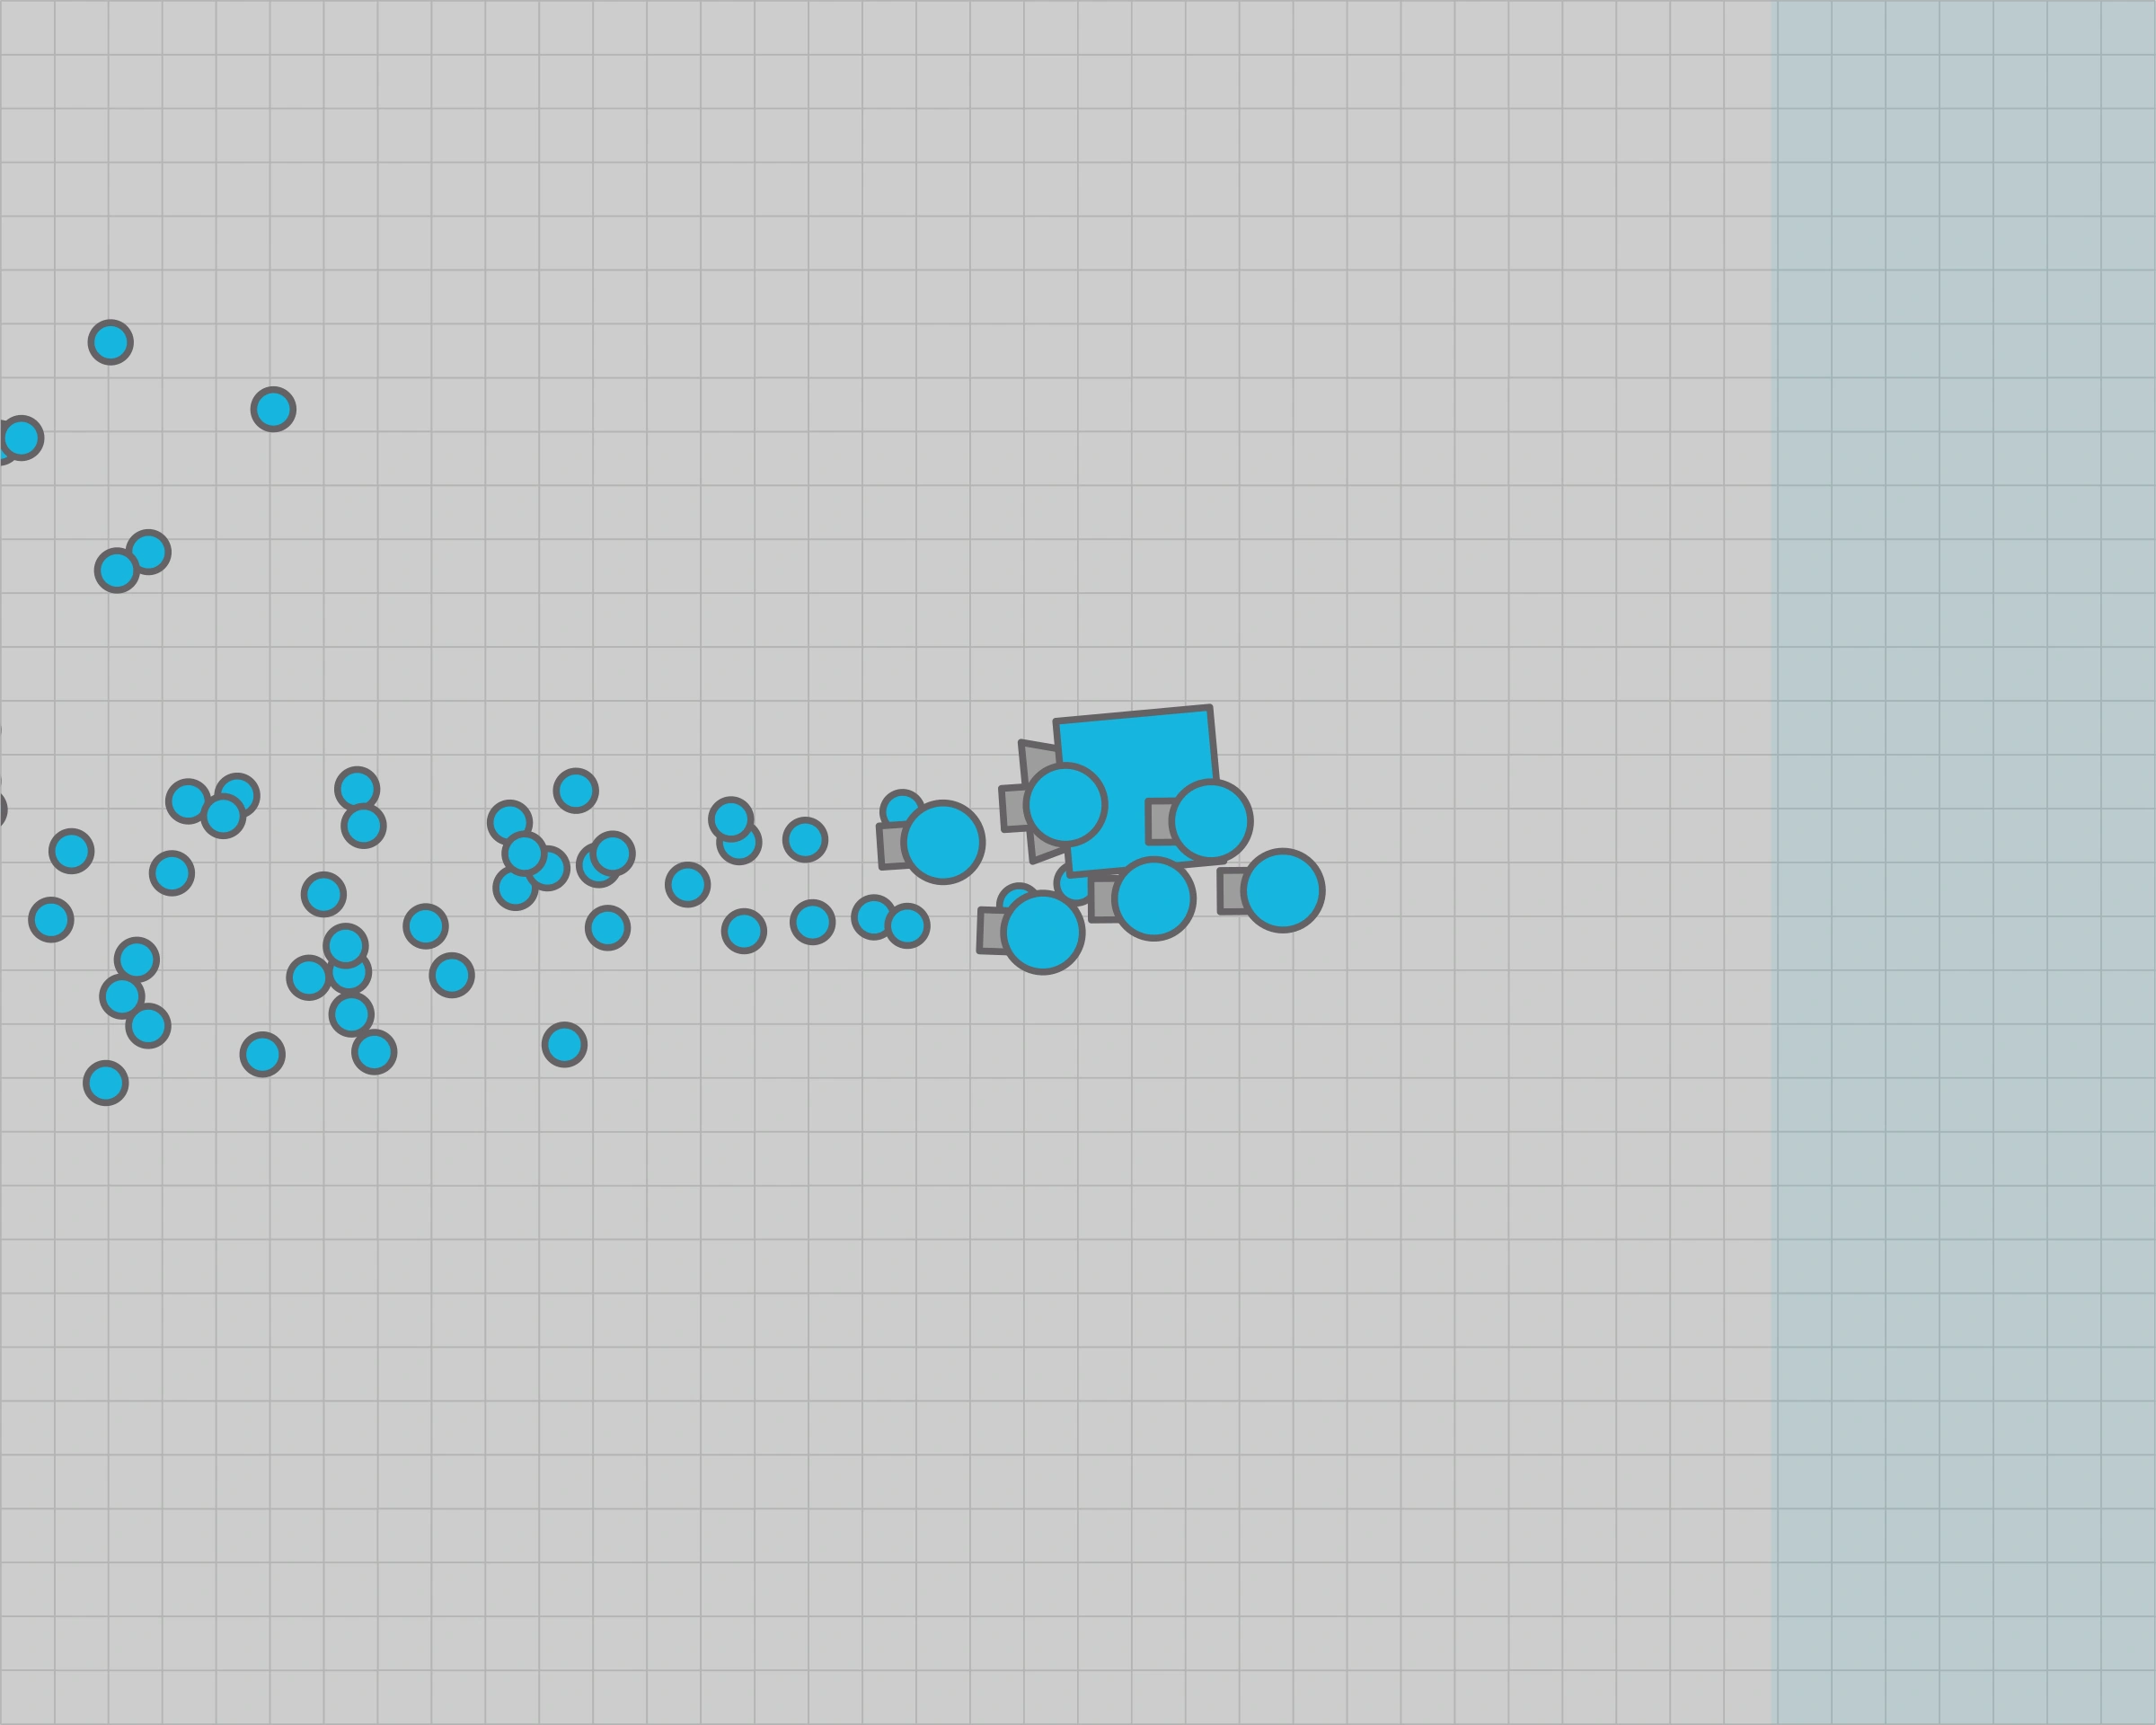
- When they’re not attacking anyone: Moving with the Drones in a star formation and keeping 2 drones in front of their tank will protect players from incoming projectiles of almost all classes.
- Making the drones face backwards and thus, hiding their Bullets (and therefore their location) from people in front of them. (Which can be useful for ambushes).
- And keeping non Tri-Angle branch glass tanks from boosting in their direction and chasing it.
- Depending on the build and internet speed, delay upon the update of the cursor’s position may cause the stuttering of the drones — pressing the W/A/S/D keys perpendicular to the direction in which the tank is going (once every 1-2 seconds) may be necessary; so as to not let any drones bounce out of formation whilst moving.
- When they are in battle: Players should move with their Drones while clicking ahead of them. (So as to keep the drones outside of the blue orbit).
- The resulting bullet stream will enhance their drone shield — by weakening projectiles before they hit the drones.
- And eventually form a bullet wall (similar to those of Bullet Rammers), capable of enhancing their momentum by around 50%.
- It should be noted that the bullet stream makes up for almost 51% of the class’ total DPS and that thus, it should not be disregarded in combat.
- Due to its short range, high DPS and complex controls (orbits), the Factory benefits from close range fights the most, as it can use its similar Drone-to-Body speed to simultaneously protect itself and attack at the same time regardless of its slow projectiles.
- The strategy against this tanks should consist mainly of moving with the drones and clicking ahead of the tank.
(Again, so as to keep the drones outside of the blue orbit). Predicting if the enemy will try to move sideways and correcting the drones aim appropriately.
- Why does it work?
- Bullets are faster than tanks, if one aims the drones at the place at which the enemy is going to be, there will be a much higher chance of the bullets actually making contact.
Against the Factory[]
- If the player is a tank of the Sniper branch with a wider FoV (most notably the Assassin branch and Predator), fire at the Factory while it’s distracted, in auto mode or if its Drones are far away enough. Keeping a Factory at the edge of the screen while changing position every time you fire being crucial to keep your location hidden and successfully kill the Factory.
- Players using the Overseer branch should try to guide the Drones to this tank. (Multi-directional attacks being particularly useful against less skilled users).
- As rammers, players should be careful not to speed through more than 1 or 2 Factory Drones; as collision damage will be very high and their health will be worn down. Players should also beware of the Drones’ bullet stream, as well as the Factory being able to spawn new drones in their direction. For in either case collision damage will slow them down; taking sizeable damage on the latter.
- As the Battleship, a glass build is best for fighting a Factory. Make the Drones go around the Factory Drones’ bullets and focus on the Factory itself, damaging it until it dies or gets too close. If the latter happens, controllable Drones should be put in front of the Battleship to weaken incoming Bullets, letting the AI Drones target the Factory instead.
- Like rammers, Bullet Rammers should attempt to lure the Factory into departing from its Drones, focus on the Factory itself, or weaken its defense. Beware that unlike with the Overlord and other Overseer branches it will be impossible to overwhelm the Factory’s reload if the tank is using its Bullet stream to enhance its defense.
History[]
- This tank was released on the 8th of November, 2016.
- The tank was originally called the Master, but renamed to Factory shortly after its release.
- On the day it was introduced, an update came out that changed the appearance of the Factory. It used to have a circular body with three spawners and looked very similar to the Overtrapper.
- The previously uncontrollable drones were given extensive controls in exchange for the firepower lost from the additional barrels.
- As of November 19th, there is a very small chance for new players to spawn out of it. It is the only tank with such a feature. Roughly 15% every time a new player connects or respawns. [Tested with a single Factory present].
Trivia[]
- This tank, alongside the Necromancer and the Summoner, is the only entity with a square-shaped body.
- It is the first class to spawn projectiles that can spawn more projectiles.
- It is the first class to have a purple background on the icon.
- As of November 19th, there is a very small chance for new players to spawn out of it. It is the only tank with such a feature.
- The Factory has a very slight recoil as it spawns its Drones (Less than 2 background squares every 6 Drones, when stationary).
- Although weak, individual Drone bullets are still more durable than Battleship’s partisans.
- The Drones themselves are as strong as 1.4 traps each, rivaling with the Skimmer’s missiles in terms of durability. 2 Factory Drones are usually enough to nullify 1 Destroyer class projectile.
- A level 45 Factory Drone is still smaller than a level 1 controlled tank.
- It takes as few as 3 maxed out Factory drones and 8 bullets to kill a non-Smasher branch rammer at full health.
- The Drone’s trigger range is smaller than the one of an Auto-Turret yet larger than the one of most other Drone-controllers.
- The Factory is the only tank that can effectively buff itself by gaining more aimable cannons, cannons it can then use in addition to its Drones to increase its frontal fire capabilities.
- The size of a factory drone corresponds to the level of the factory at the moment at which it spawns. In Sandbox, if a factory spawns a drone, levels up, and then spawns another drone, the second drone will be bigger than the first.
- For a few days between November 12th and 18th, the Factory’s drones would move in circular orbits rather than elliptical ones when using right-click. Because of this, the player was able to get a more stable control of its drones when repelling using right-click.
- The Drones get very slight recoil from shooting bullets. It is so slight that one needs max Reload and 0 Bullet Speed for it to make a visible difference. They are considerably faster when AI controlled.
Gallery[]
")
")
")
")
")
Note that the drones move at a similar speed to that of the Factory.
")
")
")
")
With 3 Drone spawners spaced out evenly in a 120° degree angle around the tank.
Footnotes[]
- ↑ In addition to the stats mentioned in the nearby Infobox, the factory also gets increased Bullet Penetration and Damage from its Drone’s bullet stream.
|